📜 The Story Behind This Dish
The journey of banana bread, like many beloved comfort foods, is intertwined with ingenuity and necessity. While bananas themselves only became widely available and popular in the United States in the late 19th century, it wasn’t until the 1930s that banana bread truly found its footing. The advent of baking powder and baking soda as widely distributed leavening agents played a crucial role, providing a reliable way to achieve a fluffy, tender texture without the need for yeast. The Great Depression also sparked a culinary revolution of frugality, encouraging home cooks to waste nothing, especially overripe produce.
From these humble beginnings, banana bread quickly evolved from a simple way to utilize browning fruit into a staple of American baking. Early recipes often appeared in community cookbooks and product advertisements, with brands like Chiquita (who started promoting bananas heavily in the 1940s) indirectly fueling its popularity. Its enduring appeal lies in its simplicity, its forgiving nature, and its remarkable ability to evoke a sense of nostalgia. Whether it’s a quick breakfast, a cozy afternoon treat, or a thoughtful gift, banana bread has cemented its place in kitchens worldwide, continually adapting with new variations and flavors while retaining its core, comforting essence.
🔬 Why This Recipe Works
The magic of banana bread truly lies in understanding the synergy of its core ingredients. At its heart are, of course, the **overripe bananas**. Their deep brown spots are not a sign of spoilage, but rather perfection. As bananas ripen, their starches convert to sugars, intensifying sweetness and creating a softer texture that easily breaks down into a moist, flavorful pulp. This enzymatic breakdown also introduces complex aromatic compounds that contribute to the bread’s signature taste. Beyond sweetness, mashed bananas provide essential moisture and contribute to the bread’s tender crumb.
**All-purpose flour** provides the foundational structure, creating the gluten network that holds everything together. For a truly tender loaf, avoiding overmixing is paramount to prevent excessive gluten development. **Granulated sugar** isn’t just for sweetness; it also contributes to the bread’s moisture, keeping it from drying out, and aids in the beautiful caramelization of the crust. **Fat**, whether butter or oil, is crucial for tenderness and richness. Butter imparts a complex, nutty flavor, while oil often yields a moister, more uniformly tender crumb. The leavening agents, typically **baking soda** (which reacts with the acidic bananas and buttermilk/sour cream if used) and sometimes **baking powder**, are responsible for the bread’s airy rise, creating those delightful pockets of softness. Finally, **eggs** act as binders, emulsifiers, and contribute to the bread’s richness and structure, while a touch of **vanilla extract** and **salt** amplify and balance all the glorious flavors.
👨🍳 Step-by-Step Instructions
Step 1: Mise en Place: The Art of Preparation
Before the symphony of baking begins, the stage must be set. Arrange your ingredients with intention: golden-brown bananas, patiently waiting their transformation; a pristine bowl of all-purpose flour; glistening sugar; a stick of softened butter, rich and inviting; farm-fresh eggs; and the humble yet mighty leavening agents. Imagine the vibrant contrast of creamy butter against the deep hues of mashed banana, the geometric precision of measuring cups, and the gentle curl of vanilla extract swirling in a spoon. This isn’t just gathering ingredients; it’s an act of culinary mindfulness, a visual promise of the deliciousness to come. Ensure everything is at room temperature for optimal mixing and emulsification.
Step 2: The Alchemy of Mixing: From Separate to Sublime
The true artistry of banana bread emerges in the mixing. Begin by creaming the softened butter and sugar until light and fluffy, a pale, aerated cloud. Then, one by one, incorporate the eggs, each addition transforming the mixture into a silken, glossy emulsion. Now, introduce the mashed, fragrant bananas, folding them in gently until just combined. In a separate bowl, whisk together your dry ingredients, ensuring even distribution. The final, delicate dance is the careful marriage of wet and dry. Pour the wet into the dry, stirring *just* until no streaks of flour remain. Resist the urge to overmix; a few lumps are a sign of a tender, moist crumb, ensuring the loaf remains airy and light.
Step 3: The Golden Transformation: Baking to Perfection
With your perfectly prepared batter lovingly poured into a greased loaf pan, the oven awaits its sacred duty. As the heat permeates, a miraculous transformation begins. The leavening agents activate, causing the bread to majestically rise, its surface slowly browning to a deep, inviting golden hue. The air fills with an intoxicating perfume – a heady blend of sweet banana, warm vanilla, and caramelized sugar that promises pure delight. Watch through the oven door as the crust develops, a slight crack appearing down the center, a testament to its perfect structure. When a skewer inserted into the center emerges clean, the moment of triumph has arrived. A perfectly baked loaf, glistening and aromatic, ready to cool and reveal its tender heart.
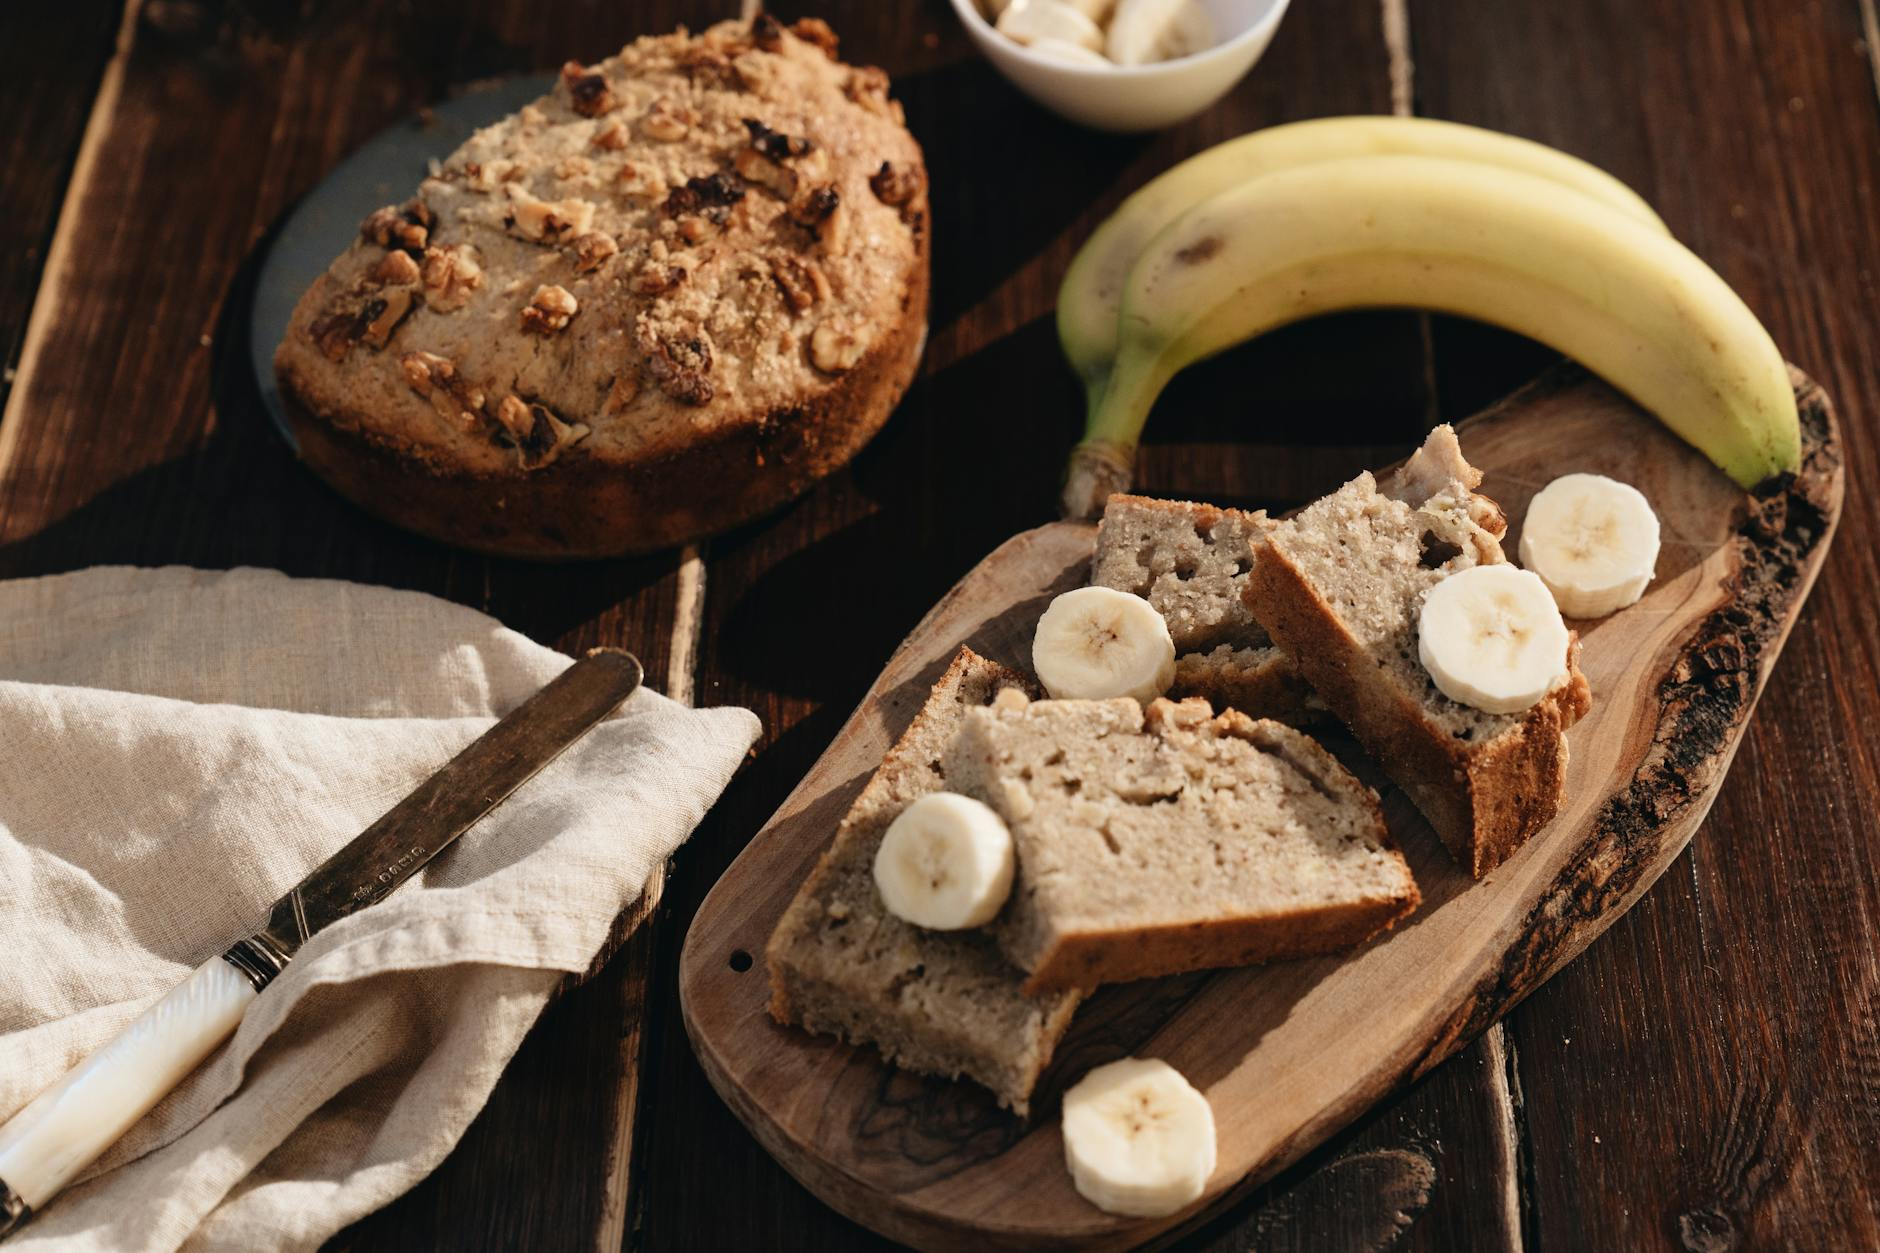
- **Embrace the Spots:** Always use very ripe bananas (those with significant brown spots or even fully blackened peels). They are sweeter, softer, and provide more intense banana flavor and moisture.
- **Don’t Overmix:** Stir the wet and dry ingredients together only until just combined. Overmixing develops gluten, leading to a tough, dense bread instead of a tender, moist crumb.
- **Room Temperature Ingredients:** Ensure eggs and butter are at room temperature. This allows them to emulsify better, creating a smoother batter and a more uniform texture in the final loaf.
- **Add-Ins Galore:** Elevate your banana bread with additions like chopped walnuts or pecans, chocolate chips, shredded coconut, or a swirl of cream cheese. Fold them in gently at the very end of mixing.
- **Cool Completely (Almost!):** While tempting, let the banana bread cool in the pan for 10-15 minutes before transferring it to a wire rack to cool completely. This prevents it from collapsing and ensures a stable structure for slicing. However, a slightly warm slice with melting butter is pure bliss!
Frequently Asked Questions
The riper, the better! Look for bananas with plenty of brown spots, or even almost entirely black peels. This indicates their starches have converted to sugars, making them sweeter and easier to mash, imparting maximum flavor and moisture to your bread.
Yes, you can! Since ripe bananas are already very sweet, many recipes can accommodate a reduction in sugar by 1/4 to 1/3 cup without significantly impacting the taste. However, be aware that sugar also contributes to moisture and browning, so adjust accordingly.
Store banana bread tightly wrapped in plastic wrap or in an airtight container at room temperature for up to 3-4 days. For longer storage, refrigerate for up to a week, or wrap individual slices tightly and freeze for up to 3 months. Thaw at room temperature or gently warm in the microwave.
A dense or dry loaf is often due to overmixing the batter, which develops too much gluten. It can also be caused by using too much flour (always measure flour by weight if possible, or spoon it into your measuring cup rather than scooping), or baking at too high a temperature for too long.
The Golden Loaf: Rediscovering the Irresistible Charm of Banana Bread
Ingredients
- 3 very ripe medium bananas, mashed
- 1/2 cup (113g) unsalted butter, softened
- 3/4 cup (150g) granulated sugar
- 2 large eggs, room temperature
- 1 tsp vanilla extract
- 1 1/2 cups (180g) all-purpose flour
- 1 tsp baking soda
- 1/2 tsp salt
- Optional: 1/2 cup chopped walnuts or chocolate chips